
Table of Contents
If you’re unhappy with how your website runs on your current hosting provider, you may be thinking about transferring to somewhere new. Many people migrate their site to GoDaddy, a well-established company with longtime excellent services. Also, GoDaddy is one of the most popular domain registration companies globally, and having your domain registered and hosted in the same place can be quite convenient.
Once you’re confident about moving your website to GoDaddy, the steps you take may vary depending on where your site is currently hosted, your hosting type, your content management system (CMS), and more. Get started with this high-level overview of how to transfer hosting to GoDaddy.
Key takeaways:
- How long it takes to transfer hosting to GoDaddy and whether your entire website can be moved
- How much downtime your site will experience during the transfer
- What steps need to be taken to transfer your site to GoDaddy
How Long Does It Take To Transfer Web Hosting?
Once you take the steps and have your new hosting account operational, the process will take around an hour to complete.
How long it takes to migrate from one host to another depends on many factors, including:
- How much data your site has
- The type of hosting you use, such as shared, virtual private servers (VPS), and dedicated
- Your experience managing websites
Can You Move Your Entire Website to GoDaddy Hosting?
When migrating, you won’t just redirect your website’s URL to a GoDaddy hosting account but will be moving all the data from your current server to a new one.
In this process, all of the data will be transferred so that when the process is completed, your site loads up from the GoDaddy servers to look like it did on your old hosting company.
Avoiding Downtime During the Migration
Some peoples’ biggest worries when migrating their website to GoDaddy is how long their website will be offline. This is a big deal when moving business websites, especially since visitors are given an error message when a site is down and may move to a competitor’s website.
As long as you plan everything and execute it properly, your site never has to be offline or unavailable to visitors. To transfer a site to GoDaddy without downtime, complete all the steps below while your site runs on your current hosting server. If you aren’t sure how to take these steps, don’t hesitate to contact the GoDaddy support team for assistance.
How Do You Transfer Your Site to GoDaddy?
These instructions are made assuming your current hosting account and the new one with GoDaddy are both Linux-based options with cPanel available. This is the most common setup, especially for individuals and small business websites. If you’re using a Windows-based hosting solution, the specific steps will be slightly different, so keep that in mind.
Sign up for services on GoDaddy
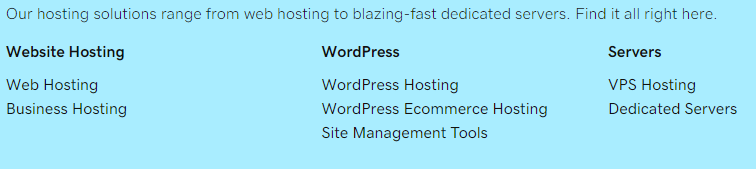
The first thing you want to do is choose which GoDaddy hosting package is right for you. It has several options, including shared hosting, VPS hosting, and dedicated servers. Once you pick out which hosting works best for you, sign up for the service.
Depending on which hosting type you choose, it may take anywhere from a few minutes to a few hours to get all the details of your hosting account. It will send you key information like your temporary domain, the link to your cPanel account, and your login information. You must have all of this ready to complete the transfer, which is why you must complete this step first.
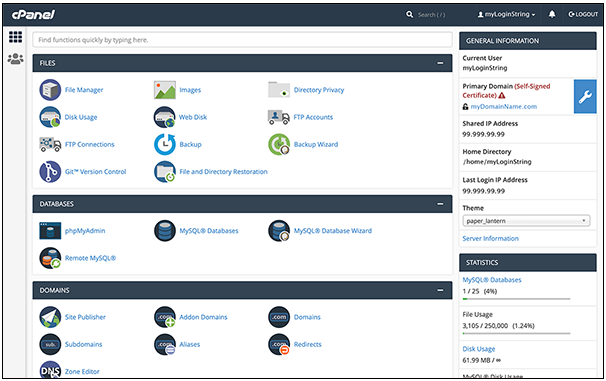
Backup your cPanel Account at your current host
The next step is to access your cPanel account on your current host and back up all your files. This is a simple process that usually only takes a few minutes to complete, although it could take a little longer if your site has a large amount of data.
To complete this step, simply follow these instructions:
- Access the backup wizard: Go to the Files section of cPanel and click on the backup wizard. This brings you to the area where you can fully backup your site.
- Click backup and select what to backup: On this page, select the option to create a backup and pick what you need to be backed up. Typically, you want your home directory, which includes all files under that directory and all your MySQL databases used for your site.
- Add email information if needed: If you have created email accounts and forwarders for your site, you can add them to the backed-up data as well if you want them moved over.
- Select relevant domains: If you have more than one site you’re transferring to GoDaddy, you can choose to make backups of all of them now. Skip this step if you’re only moving one site over.
Once the backup program has run, note where it placed the backup files. It’s generally best to have the backup file stored on your PC to be uploaded easily to GoDaddy in the next step.
Restore your cPanel account on GoDaddy
Next, log into the cPanel on your GoDaddy account. The link to this and your account information should have been emailed to you. To complete this process, go to the files section of cPanel and, again, click the backup wizard.
This time, choose restore. Start by restoring the home directory, then go through and restore your MySQL databases and email accounts if needed. Once done, the data for your site has been transferred to GoDaddy and is technically ready to go.
Test your site on GoDaddy
Before you start sending traffic to your new GoDaddy hosting account, test everything to ensure it’s working properly.
In your welcome email from GoDaddy, you’ll have been given a temporary domain or an internet protocol (IP) address to access your site. Put that domain into your browser’s address bar to ensure everything works correctly. Your site should load without any trouble.
Update your nameservers and DNS
If everything is working properly, update your nameservers to point traffic to the GoDaddy servers. Since you likely registered your domain with GoDaddy, you can update your nameservers there. You also need to update your Domain Name System (DNS) information. On your cPanel, go to the DNS manager and update your primary A Record to point to the IP addresses in your welcome email from GoDaddy.
Now new visitors to your site will begin coming to your GoDaddy-hosted page. It may take a few hours to a few days for all DNS servers and browsers to get updated so they send traffic to GoDaddy instead of your old host. Wait for at least a couple of weeks before canceling your old hosting account to avoid any problems — and enjoy the great service from GoDaddy for years to come.
FAQS About Transferring Hosting to GoDaddy
Can I transfer my hosting to GoDaddy?
How do I transfer my existing hosting account?
Does it cost to transfer a domain to GoDaddy?
Best website builder for small businesses
Best website builder for small businesses
Best website builder for beginners
Best website builder for beginners